How to Create Custom Table.
How to Use Amo Table With any Affiliate Programs.
Please follow the steps below to add new custom table:
First you need to Install and activate Amo Tables in your Wordpress websites.
Read more about here: How to Install, Activate and Update Amo Tables.
1
Step 1:
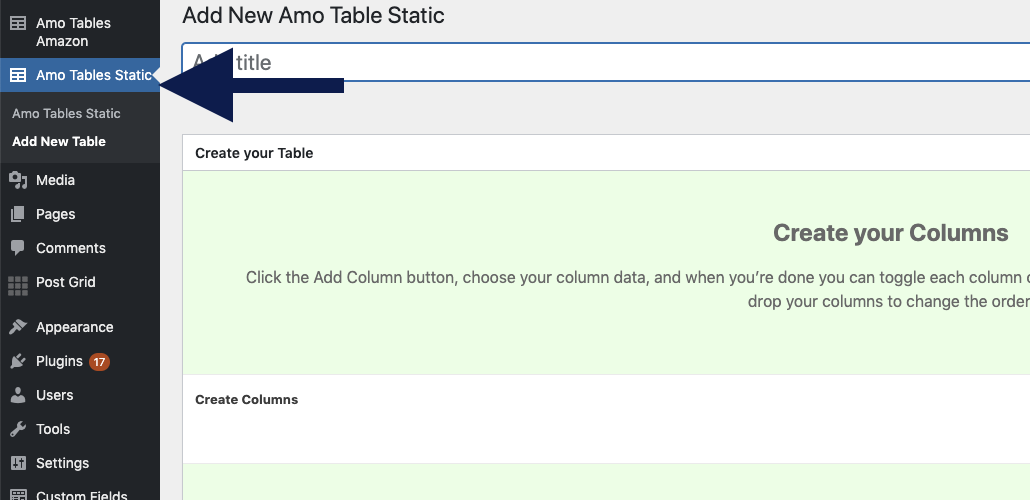
Choose “Amo Tables Static” in WordPress admin panel then Click “Add New Table”
2
Step 2:
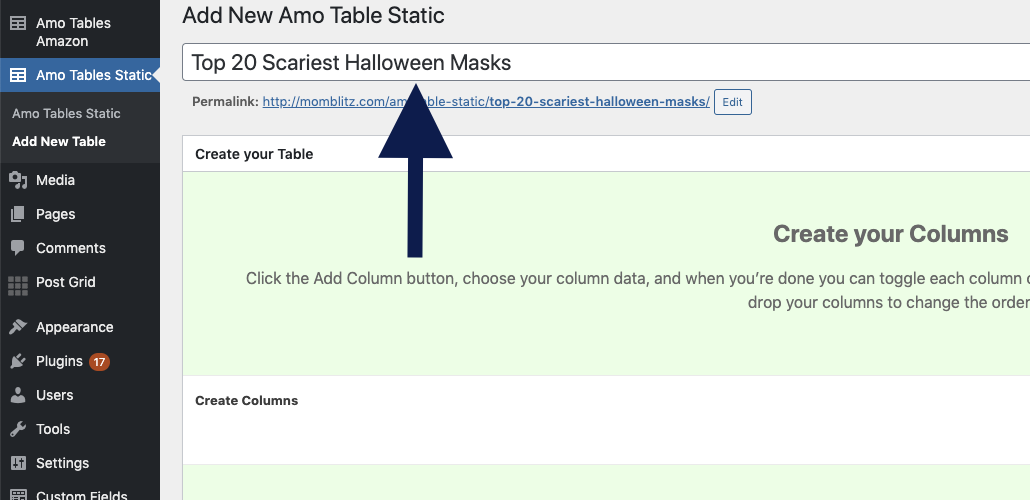
Type your custom table title:
3
Step 3:
Create Table Columns. Click "Add Column" to add your first table column.
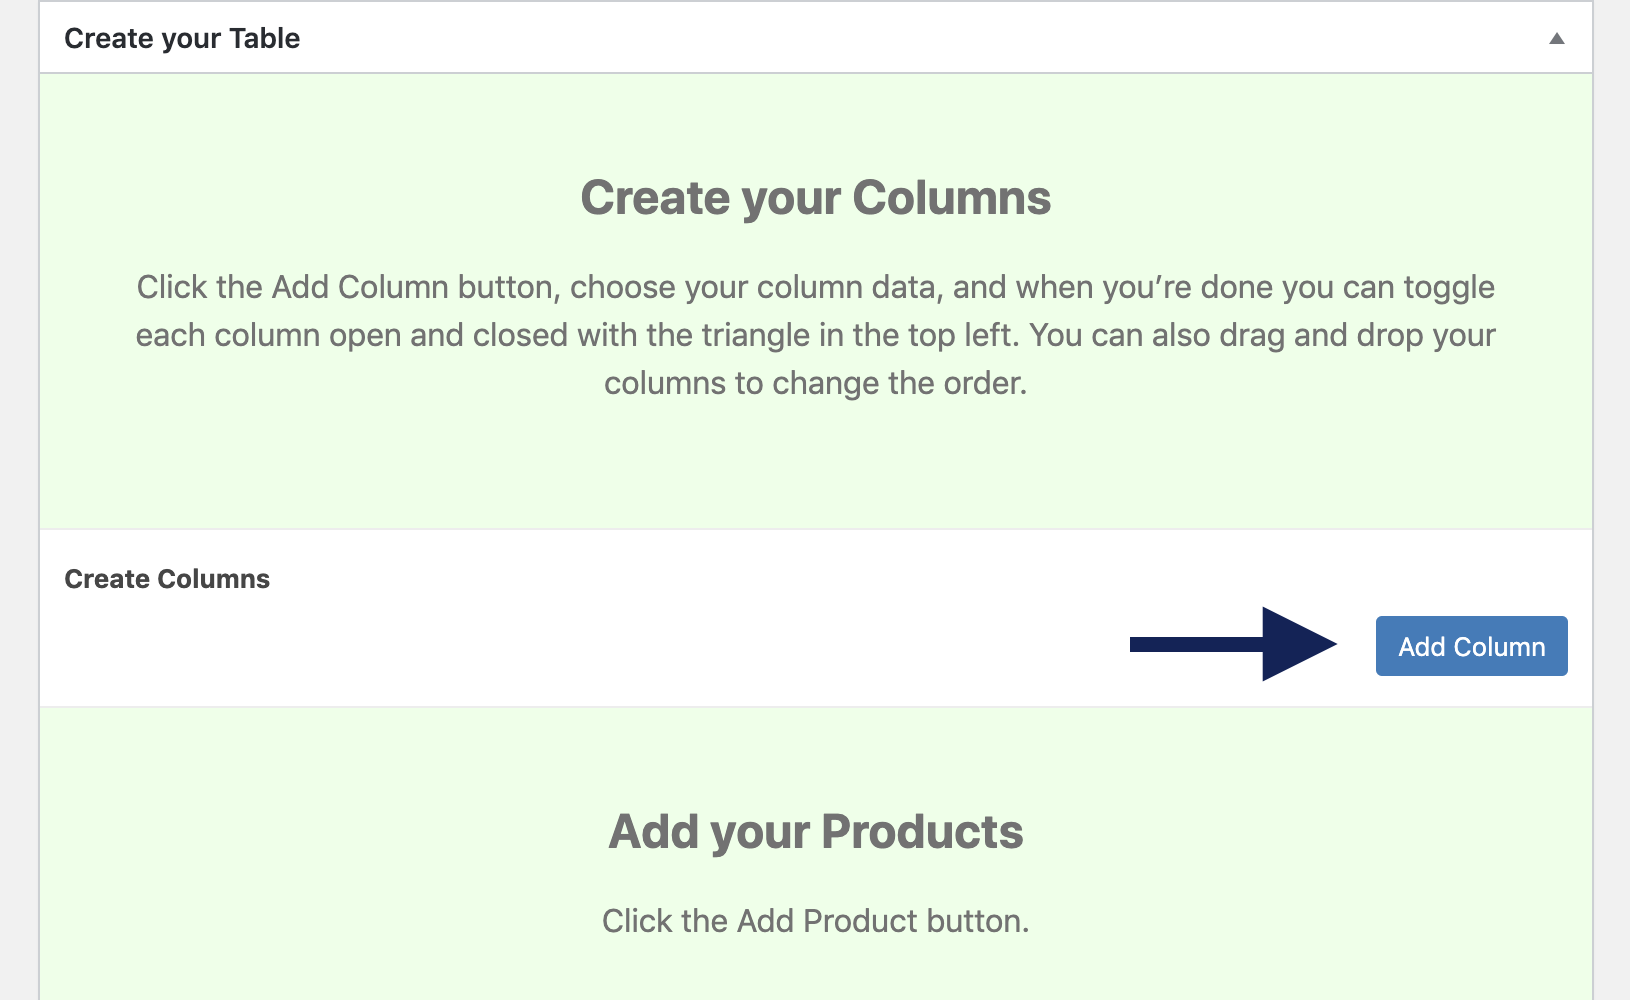
Here you can add as many columns as you would like. (Remember: more column = more you need to hide on smaller screen sizes for better mobile experience).
The following options are available:
- Column – Choose which information you would like to get from you Affiliate Network like:
- Product Title;
- Description;
- Price;
- Brand;
- Image - product Image from WordPress Media Library on your site;
- Image by URL - here you can use product image links that Merchants provide you via Affiliate Network or partner platform.
- Affiliate Link Image Button - choose different Product purchase button.
- Affiliate Link Plain Button & Text - set custom text in "Button Label" field for product purchase button (Have a look at screenshot below).
- Affiliate Link Text - set custom text in "Button Label" filed for your affiliate link.
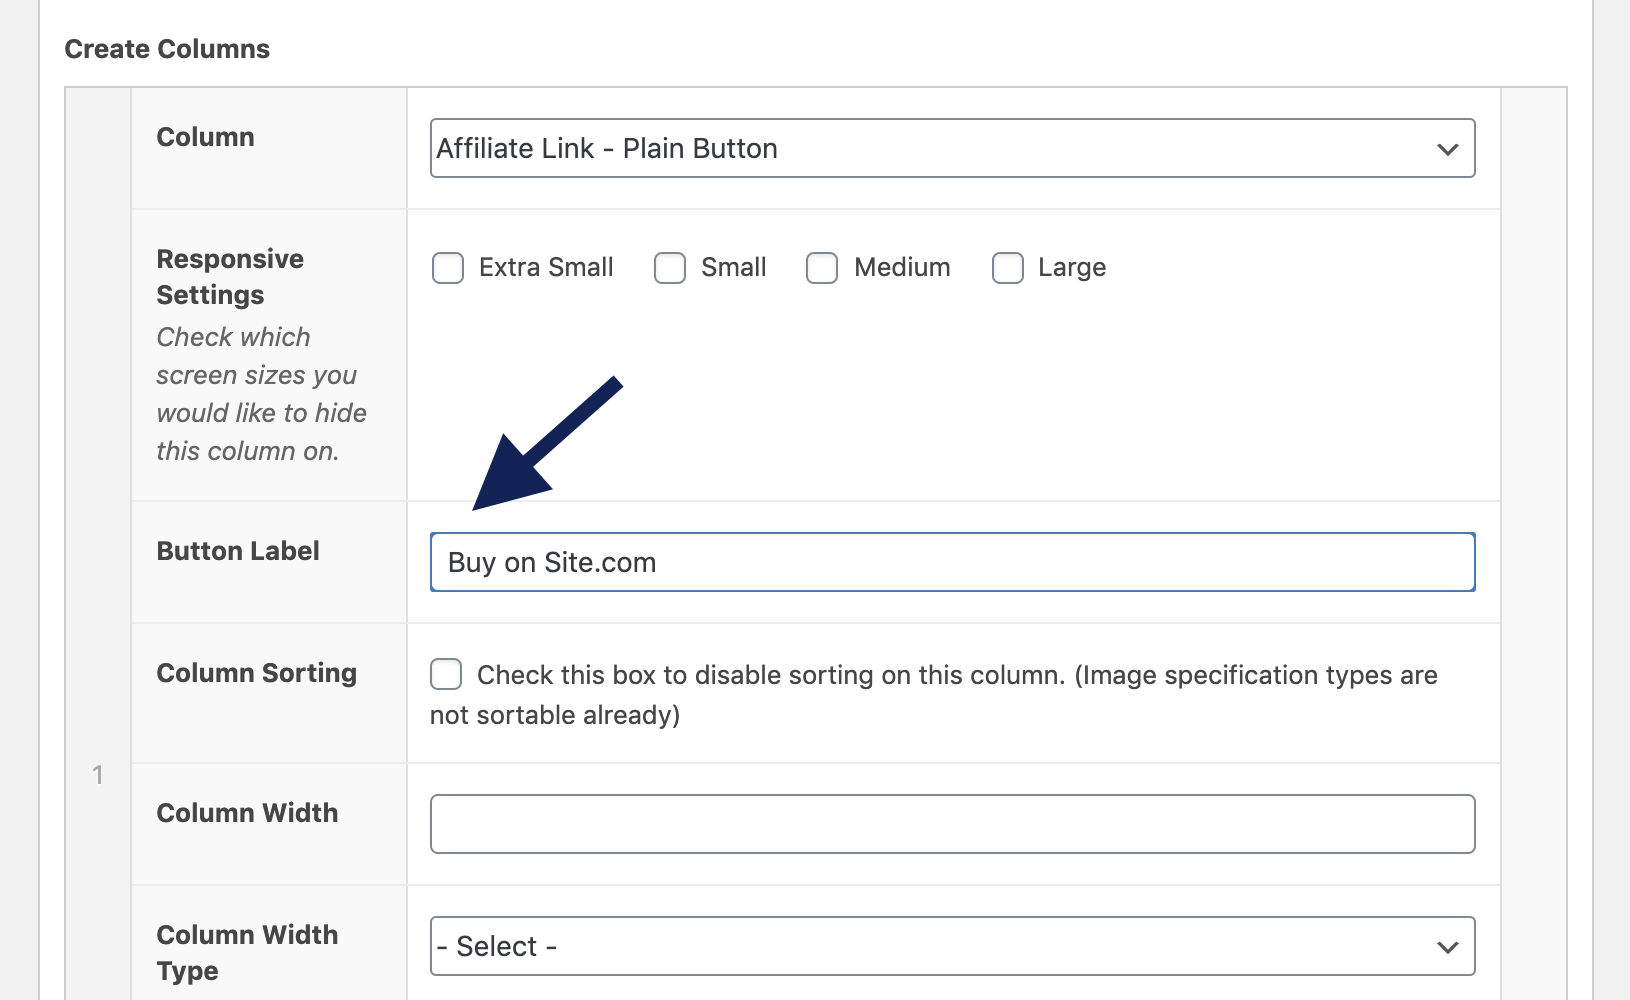
- Responsive Settings – Check which screen sizes you would like to hide this column on by default. Visitors can access this column by toggling the product extra data open. (Remember, the smaller the screen size, the less columns should be displayed by default. We recommend only display you most important columns on extra small and small screen sizes.
- Column Sorting – If table sorting is enabled in the global settings – here you can disable sorting on this column.
- Column Width – Force table column widths to always be fixed regardless of contents. Useful for long products names and descriptions.
- Column Width Type – Choose pixels or percentage.
- Link – choose “Affiliate Link” if you want to add Affiliate Link over this data cell.
- Column Horizontal Alignment – Left, Center or Right – set the alignment of your table cells horizontally.
- Column Vertical Alignment – Left, Center or Right – set the alignment of your table cells vertically.
4
Step 4:
Add your Products.
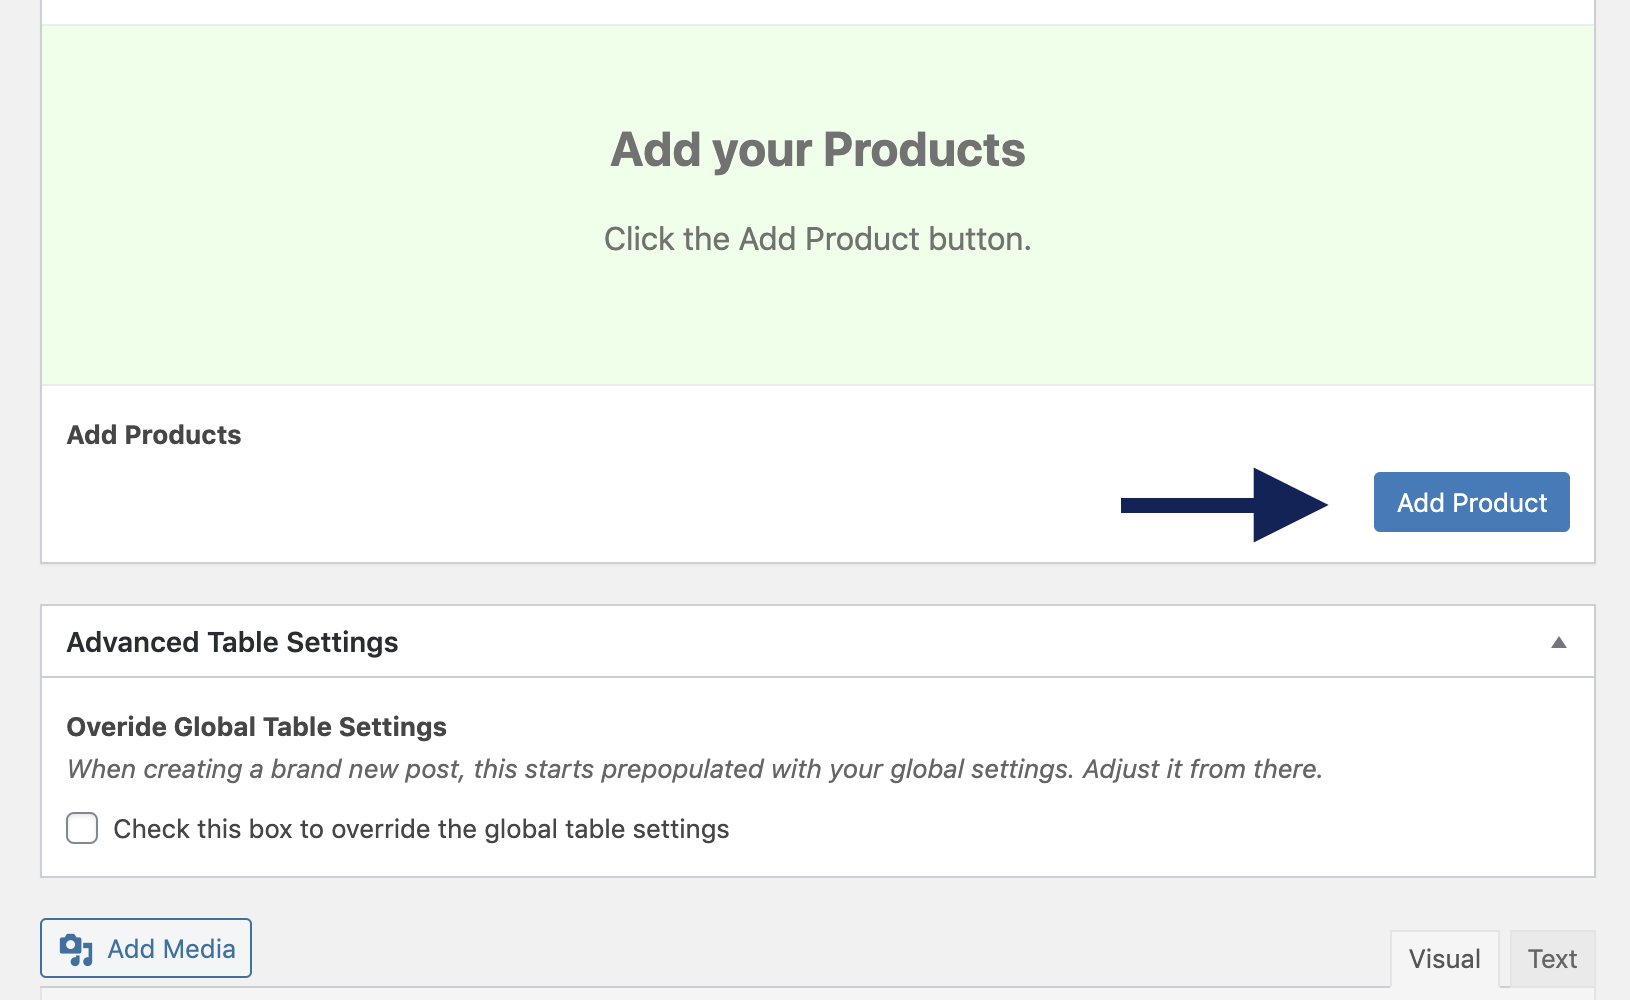
Click “Add Product” button, then edit your products and fill fields with values.
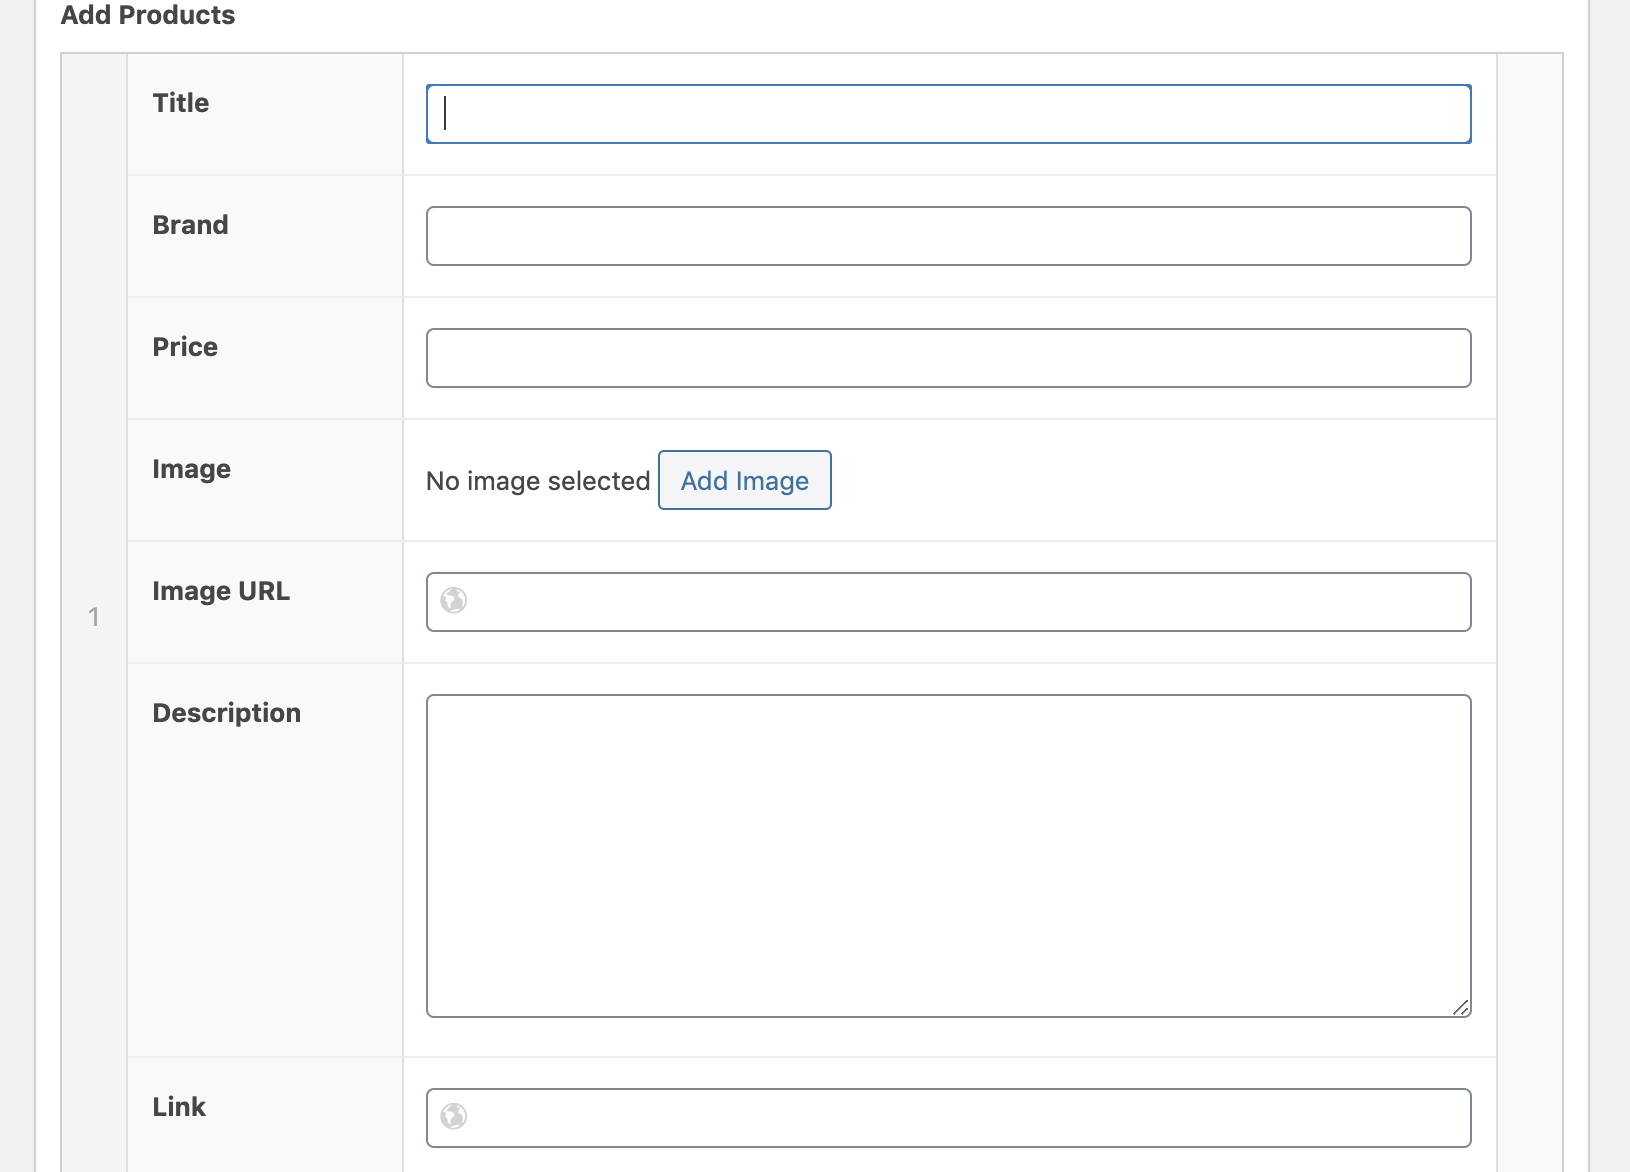
- Title - Product Title;
- Brand - Prodyct Brand;
- Price - Product Price;
- Image - Product Image from WordPress Media Library;
- Image URL - Product Image URL provided from Affiliate Network or partner platform. (Note: Choose only one option - Image or Image URL);
Description - Product Description;
Link - Add affiliate link to Product.
5
Step 5:
Publish & Embed your Table into any Post or Page.
Publish you table, the Publish module is located on the right side of the Add New (or Edit) Post page. Just click the title of the Publish module to expand the settings you need.
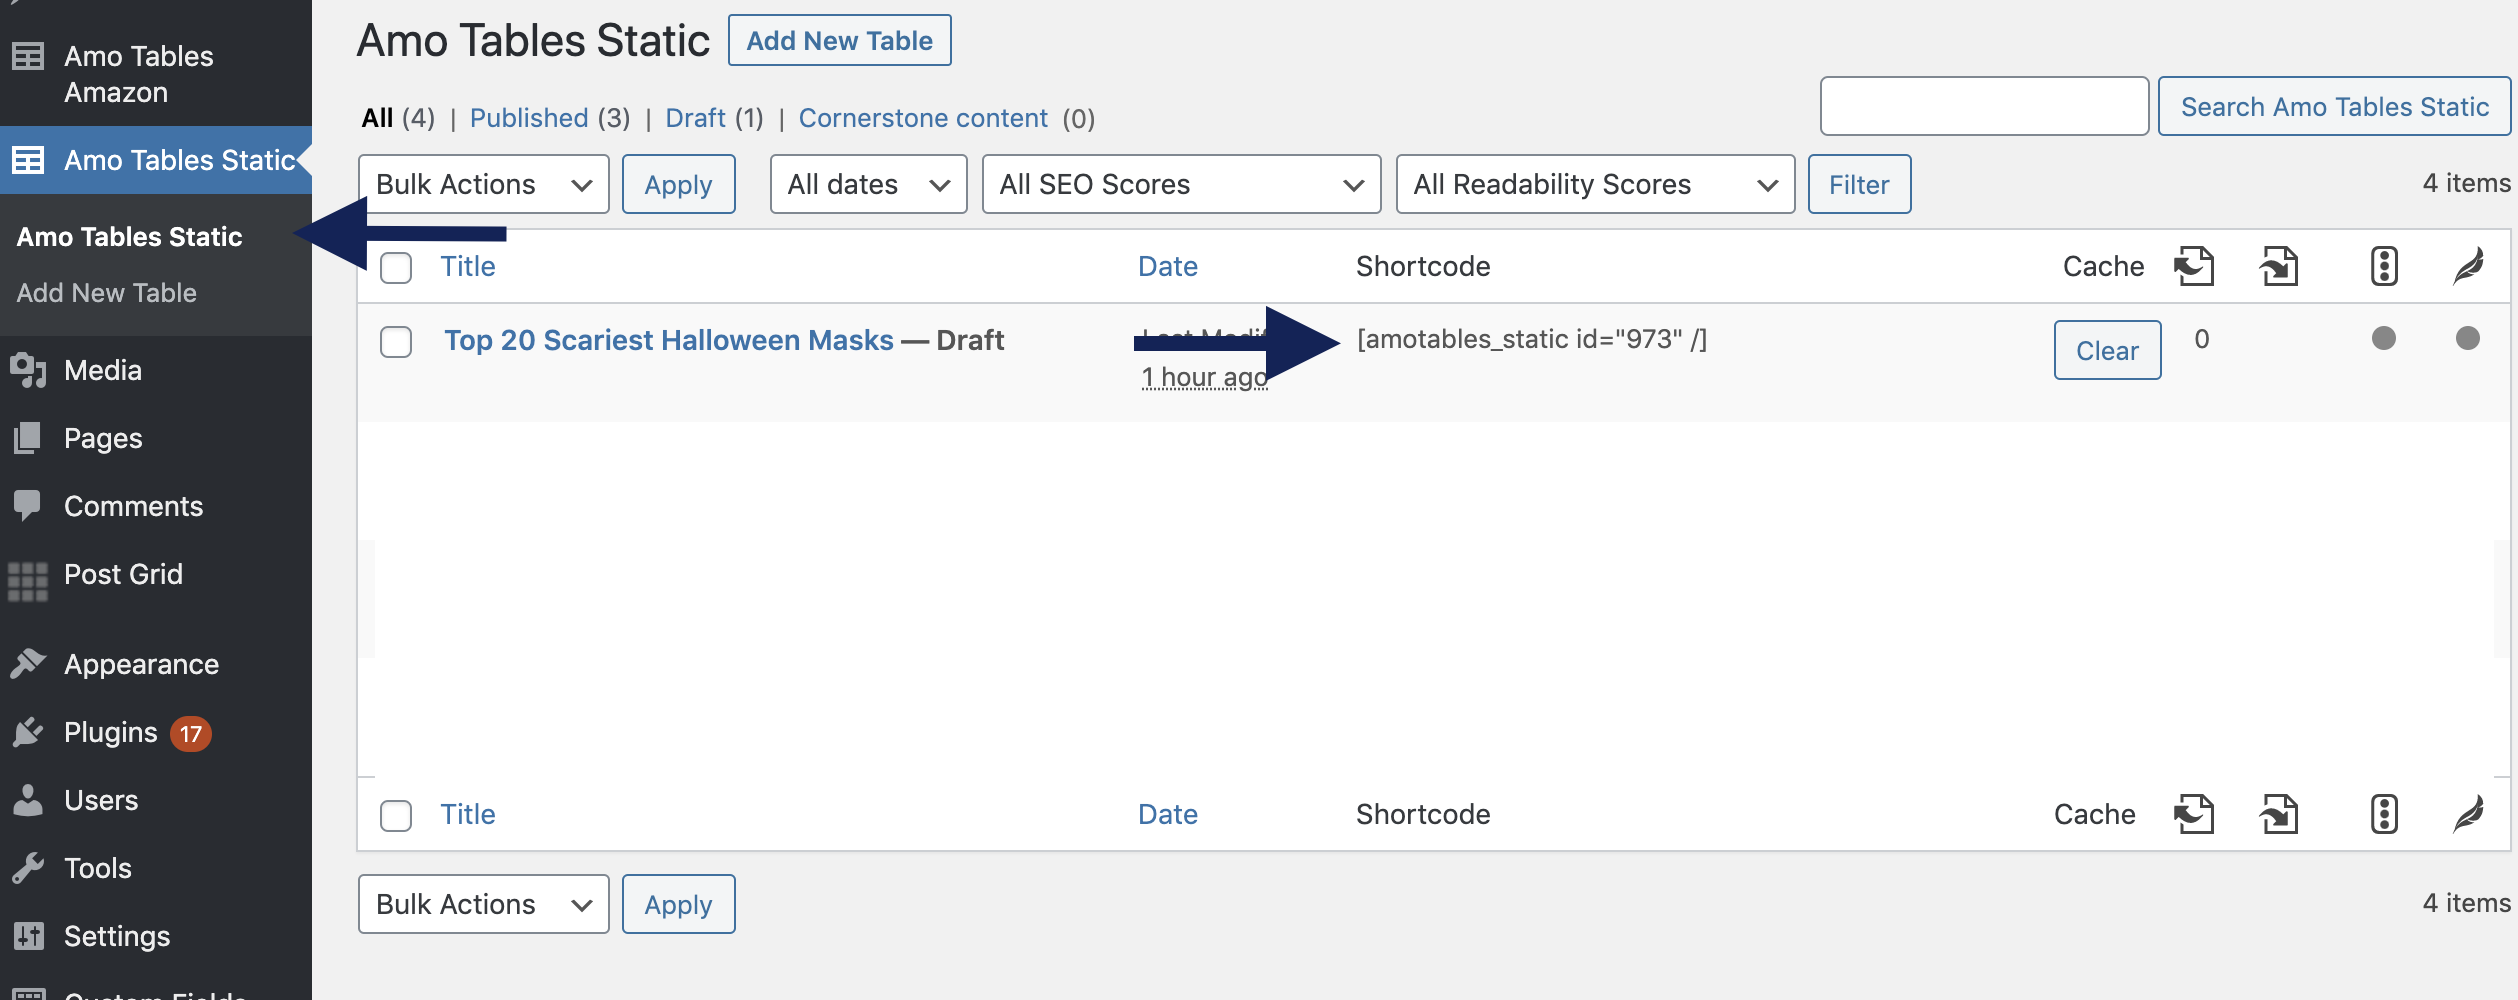
You can find the shortcode for each table you created on the “Amo Tables Static” page in your WordPress admin.
Copy the shortcode (looks like amotables_static id="973" /) into any post or page.
6
Step 6 (Otional):
Check this box if you want to open the Global Table Settings and change what you want.

Get Amo Tables Wordpress Plugin
There are a lot of Amazon affiliate WordPress comparison table plugins. The problem is that most tables just don’t work well on mobile devices and they lack the important features that your visitors need. Also the prices of all of these. Also, the prices of all these plugins are incredibly high. That ends today with Amo Tables – your #1 solution of your Amazon product tables.